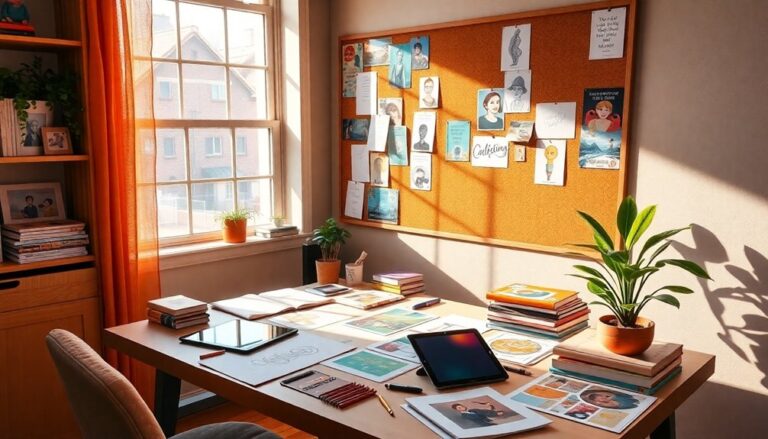
To build an animation pipeline as an indie creator, start with solid pre-production. Sketch your ideas and craft a storyboard to visualize the project. Design your characters and determine the visual style. Move on to production by selecting the right software—Toon Boom Harmony for 2D or Blender for 3D. Don't overlook post-production; refine your animation through editing and integrate sound design to enhance emotional impact. Finally, choose the right output formats based on your audience. By following these steps, you can create a streamlined process for your animation projects and elevate your storytelling from start to finish.
Understanding Animation Pipelines
In the domain of animation, grasping the pipeline is fundamental for turning creative ideas into stunning visuals. Comprehending animation pipelines empowers you to streamline your workflow, ensuring every stage contributes effectively to your final product. At its core, the pipeline consists of various stages that guide your project from inception to completion.
Firstly, you need to familiarize yourself with the animation fundamentals that underpin each stage. Pre-visualization sets the tone, where you sketch out your ideas and create storyboards. This step is significant for visualizing your narrative before immersing into production. Next, you'll move into modeling, where characters and environments take shape. Here, attention to detail is key; the more you invest in this stage, the richer your animation will appear.
Once modeling is complete, it's time for rigging, where you'll create a skeletal structure for your characters. This stage is imperative for achieving fluid motion and ensuring your characters can express emotions convincingly. Following rigging comes the animation stage, where you'll bring your characters to life, paying close attention to timing and movement. Finally, you'll reach the rendering phase, where your visuals are compiled, and the final output is realized.
Pre-Production Essentials
Pre-production sets the foundation for a successful animation project by organizing ideas and establishing a clear vision. It's your chance to innovate and breathe life into your concepts. Start with script development; this is where your story begins to take shape. Craft a compelling narrative that resonates with your audience and explores unique themes. Don't shy away from experimenting with dialogue and character arcs. The stronger your script, the easier the rest of the production will flow.
Next, focus on character design. Your characters are the heart of your animation, and their design should reflect their personalities and the story's tone. Sketch out various iterations, exploring different styles and features. Think about how their appearance can convey emotions and traits that align with the narrative. Collaborate with other creatives, gather feedback, and refine your designs until they resonate with your vision.
Additionally, consider the overall visual style of your project. Define the color palette, textures, and environments that will support your characters and story. This cohesive approach will unify your animation and make it visually compelling.
As you wrap up pre-production, create a detailed production schedule. This will help you allocate resources efficiently and keep your team aligned. Remember, a solid pre-production phase is essential for tackling the challenges of animation. It's where your ideas transform into a tangible roadmap for the production expedition ahead. Embrace this phase, and you're setting yourself up for success.
Design and Storyboarding
Creating a strong design and storyboard is crucial for translating your ideas into a visual narrative. This stage is where your story starts to take shape, allowing you to visualize scenes, character movements, and the overall flow of your project. Begin by sketching out the key moments of your animation. These sketches don't need to be perfect; they just need to capture the essence of each scene. Focus on the emotions you want to convey and how they connect to your character development.
Next, consider the style and aesthetics of your project. Are you going for something whimsical, dark, or minimalist? Your design choices will impact how your audience interprets the visual narrative. Think about color palettes, character designs, and backgrounds that complement the tone of your story.
As you move into storyboarding, break down each scene into distinct frames. This'll help you plan camera angles, shifts, and pacing. Keep your character arcs in mind; they should evolve throughout the visual narrative. Use arrows to indicate movement, and jot down dialogue or sound effects that will improve the storytelling.
Don't shy away from experimentation during this phase. Innovative designs and unexpected compositions can uplift your project. Collaborate with others for fresh perspectives, and always be open to feedback. This foundational work in design and storyboarding will guide you through the rest of your animation pipeline, ensuring a cohesive and engaging final product.
Production Techniques
In the production phase, you'll need to focus on storyboarding and concept development to guarantee your ideas translate effectively into animation. Choosing the right animation software is essential, as it can greatly affect your workflow and the quality of your final product. Let's explore these key techniques that will set the foundation for a successful animation project.
Storyboarding and Concept Development
Storyboarding and concept development serve as the backbone of any animation project, translating ideas into visual narratives. You need to brainstorm your story's core themes and characters before plunging into visuals. This is where character development shines. Consider each character's motivations, backgrounds, and relationships; this depth will improve your storytelling.
Once you've fleshed out your characters, start sketching your storyboard. This isn't just about creating pretty pictures; it's about crafting a visual storytelling blueprint. Think of each frame as a mini-scene that conveys emotion, action, and pacing. Use strong compositions to guide the viewer's eye and to evoke the right feelings at each moment.
Don't be afraid to experiment! Play with angles, timing, and shifts to find what resonates most with your narrative. As you refine your storyboard, you'll discover how it shapes the overall flow of your animation. Keep iterating until every shot supports your vision and improves character development. Remember, a well-structured storyboard isn't just a tool; it's an essential part of your creative expedition, setting the stage for a compelling animated experience.
Animation Software Selection
Choosing the appropriate animation software is crucial for any project, as it can greatly influence your workflow and final output. You'll want to explore various animation software features to find the ones that best align with your creative vision. Look for tools that enable flexibility, such as customizable interfaces and support for multiple animation styles.
Compatibility is another critical aspect. Confirm the software you choose integrates seamlessly with other tools in your pipeline, like storyboarding or sound editing software. This connection can streamline your process, saving you time and enhancing collaboration with your team.
In addition, consider the learning curve associated with each software option. Choose a platform that not just meets your current needs but has the potential to grow with you as your skills and projects evolve.
Don't overlook community support and resources, either. A lively community can offer invaluable insights and troubleshooting assistance, making your adventure smoother.
Post-Production Workflow
In post-production, you'll focus on refining your animation through editing and assembly, ensuring every frame flows seamlessly. Sound design integration is essential here; it'll amplify the emotional impact of your work. Finally, you'll need to take into account the final output formats to guarantee your animation looks great across all platforms.
Editing and Assembly Process
After completing the animation, you'll plunge into the editing and assembly process, where all your hard work truly comes together. This is your moment to refine the narrative, improve visual flow, and create a cohesive piece that resonates with your audience. Start by organizing your footage—this simple assembly strategy can save you hours of frustration later.
When it comes to editing techniques, think beyond basic cuts. Experiment with shifts that match your animation's rhythm and mood. Don't hesitate to use color grading to unify the visual style, ensuring each scene feels like part of a larger story.
As you assemble your shots, keep an eye on pacing. The right tempo can boost emotional impact, so consider how each scene leads into the next. Use software tools that allow for easy manipulation and experimentation; flexibility is key.
Lastly, remember to leave room for adjustments. You might discover new insights during the assembly that could inspire fresh ideas. Embrace the creative process, and don't shy away from reworking sections until they feel just right. Your animation deserves that extra polish!
Sound Design Integration
Once you've assembled your visuals, it's time to enhance your animation with sound design. This step can boost your project from good to unforgettable. Start with sound design basics: identify the mood and tone you want to convey. Think about how sound effects, dialogue, and music can intertwine to create a cohesive experience.
Next, explore sound integration techniques. Layering is key—combine various sound elements to build depth. Use ambient sounds to create an immersive atmosphere, as precise sound effects can emphasize critical actions. For dialogue, guarantee clarity and proper placement in the mix, so it complements rather than competes with other sound elements.
Don't forget to experiment! Innovative sound design can set your animation apart. Try unconventional sounds or unexpected musical choices to surprise your audience. Sync your audio elements with visual cues for maximum impact—timing can make all the difference in how your message is received.
Finally, review and refine your sound choices. Play it back several times to confirm that everything blends seamlessly. By perfecting sound design integration, you'll transform your animation into a multi-sensory experience that resonates with viewers long after it ends.
Final Output Formats
Choosing the right final output formats for your animation is crucial, as it directly affects how your audience experiences your work. Comprehending video formats and compression techniques can enhance your project, making it accessible across various platforms. Here's a breakdown of key formats to reflect on:
- MP4: Widely supported, this format offers excellent compression without compromising quality, perfect for online sharing.
- MOV: Ideal for high-quality projects, it retains superior audio-visual fidelity, making it suitable for film festivals or presentations.
- GIF: Great for short, looping animations, this format is perfect for social media engagement and quick visual storytelling.
- WEBM: An emerging format that boasts superior compression and quality, especially for web use, improving your audience's online experience.
When selecting the right formats, think about your target audience and distribution channels. Each of these formats comes with unique advantages, so using the appropriate compression techniques will guarantee your content shines during its lightweight presence. By making informed decisions about final output formats, you'll ensure your animation reaches its full potential and resonates with viewers.
Tools and Software Recommendations
What tools and software should you consider in building an animation pipeline? With countless software options available, it's vital to do some tool comparisons to find what best suits your creative vision. First, think about your animation style. If you're leaning in the direction of 2D animation, programs like Toon Boom Harmony or Adobe Animate can offer robust features that allow for fluid character movements. For 3D animation, Blender stands out as a strong, open-source option that's gaining popularity among indie creators.
Next, consider your storyboard and concept art needs. Software like Storyboard Pro can streamline the storyboarding process, whereas Photoshop remains a go-to for creating stunning visuals. Don't overlook the significance of sound; tools like Audacity and Adobe Audition can help you produce and edit audio tracks that improve your animations.
For project management, platforms like Trello or Asana can keep your team organized and on track, ensuring that everyone is on the same page. And with regard to collaboration, consider using cloud-based services like Google Drive or Dropbox for easy access to files.
Finally, as you evaluate your choices, keep in mind that the best tools are those that fit seamlessly into your workflow. Test out free trials or explore community forums to gather insights from other creators. By selecting the right combination of tools and software, you'll set up a solid foundation for your animation pipeline, driving innovation and creativity in your projects.
Tips for Indie Creators
Building an animation pipeline is just the start for indie creators looking to make their mark. To truly stand out, you'll need to utilize innovative techniques that resonate with your audience. Here are some tips to enhance your project:
- Leverage Crowdfunding Strategies: Use platforms like Kickstarter or Indiegogo to fund your animation. Be transparent about your goals, share your vision, and offer compelling rewards to attract backers.
- Engage Your Community: Building a loyal fan base is vital. Use social media to connect with your audience, share behind-the-scenes content, and ask for feedback. This not only cultivates a sense of belonging but additionally can guide your creative decisions.
- Collaborate with Other Creators: Don't hesitate to reach out to fellow indie artists. Collaborations can spark fresh ideas and expand your reach. Plus, sharing resources can ease the burden of production.
- Stay Agile and Adaptable: The animation environment is always evolving. Keep an eye on emerging trends and technologies. Be ready to pivot your approach based on audience reception and industry shifts.
Frequently Asked Questions
How Do I Fund My Animation Project as an Indie Creator?
You've got a vision, but funding feels like a distant dream. To turn that dream into reality, explore crowdfunding strategies that resonate with your audience. Platforms like Kickstarter can give you the exposure you need. Simultaneously, don't shy away from investor outreach; passionate investors are often looking for innovative projects. Craft a compelling pitch that highlights your creativity, and watch as your ideas transform into funded realities. You've got this!
What Are Common Pitfalls in Animation Production to Avoid?
In animation production, you'll want to avoid common pitfalls like animation delays and resource mismanagement. If you don't plan your timeline carefully, you risk pushing deadlines further away. Keep your team informed and allocate resources wisely to prevent burnout and inefficiency. Embrace innovative tools and techniques to streamline your workflow, ensuring everyone stays focused and motivated. By sidestepping these issues, you can create a smoother, more effective production process.
Can I Outsource Parts of My Animation Pipeline?
Absolutely, you can outsource parts of your animation pipeline! By collaborating with freelance artists, you can tap into fresh ideas and unique styles that improve your project. It allows you to focus on your core strengths as you bring in specialized skills where needed. Just guarantee clear communication and set expectations to maintain quality and creativity. Embracing outsourcing can be a game-changer, giving you room to innovate and boost your animation projects.
How Do I Promote My Animation Once It's Completed?
Once your animation's complete, it's time to promote it! Start by crafting an engaging trailer release that showcases your unique style and story. Share it across social media platforms like Instagram, Twitter, and TikTok to reach a wider audience. Engage with potential viewers, collaborate with influencers, and consider hosting live Q&A sessions. Use eye-catching visuals and innovative storytelling to spark interest and create buzz around your project. Your passion will shine through!
What Legal Considerations Should I Know Before Starting an Animation Project?
Before plunging into your animation project, you've gotta tackle some jaw-dropping legal considerations! You can't ignore copyright issues that could turn your masterpiece into a legal nightmare. Nail your contract negotiations, ensuring everyone's on the same page. Pay close attention to licensing agreements—those can make or break your project. And don't forget fair use; it's a double-edged sword! Innovate with confidence, but keep your legal ducks in a row!